
Welcome to Paria's “Hike of the Week” series. This weekly series highlights an outstanding day hike or backpacking trip. We want to inspire you to get out and see these places for yourself. For us, seeing amazing photos and reading about a great hike are enough to get us motivated!
This week's hike is the West Coast Trail on Canada's Vancouver Island.
Featured Photo: Owen's Point
Why This Hike?
The West Coast Trail (WCT) is a week-long adventure sure to challenge you physically. Located in the Pacific Rim National Park, it delivers some of the most breathtaking views you can find. The hike stretches across the west coast of Vancouver Island. It's a rugged hike that leads you across rivers, rainforests, and coastal beaches. Not for the faint of heart, this trail was originally used to rescue survivors of shipwrecks.
- Distance: 75 km (47 miles)
- Type: Point-to-point
- Difficulty: Strenuous-Will challenge even experienced hikers
- Elevation gain: ~5,700 feet
- Best time to visit: May-September
- Plan on taking 6-8 days to complete.
- Enjoy scenic drives to the trailheads.
- The trail alternates between dense forests and beautiful beaches.
- Enjoy excellent scenery of the Pacific coastline.
- If you get lucky with good weather, you can expect amazing ocean sunsets every night!
Before you pack your bags, keep the following in mind:
- The southern part is more difficult than the northern.
- Permits are required and are difficult to obtain.
- Expect rugged terrain with potentially extreme weather conditions.
- This is a strenuous hike. It requires thorough comfort with navigation through deep gulleys, changing tides, and fallen trees. All hikers must have a good understanding of disaster training procedures. Rescue from the trail may take up to 24 hours.
- Some other things to expect include bridges, cable cars, ladders, and mud pools.
- Before you go, ensure you are familiar with the tidal maps. We recommend taking the coastal route between Thrasher Cove and Camper Bay through Owen's Point. But, that will require low tide. Otherwise, you'll need to take the high route through the interior.
- Vancouver Island is home to lots of wildlife. This includes both black and brown bears, wolves, and coyotes. It also has the densest population of cougars in the world. You must be aware of the potential risks of dealing with wildlife. Tie food up in trees, carry out litter, bring bear spray, and stay alert.
How Do I Get There?
The south trailhead is located in Port Renfrew on Vancouver Island in the southwestern corner of Canada. The full stretch of the WCT winds through the Pacific Rim National Park.
The two most accessible airports are Vancouver, Canada (YVR) and Seattle, Washington (SEA). From Vancouver, you will leave the mainland on the Horseshoe Bay or Tsawwassen Ferry Terminal. In total, this drive is 217 km (135 miles). Once you land on the Island, locate and follow BC Highway 1 for 50 km (31 miles). You will then turn onto Cowichan Valley Highway 18W for another 90 km (55 miles).
Getting to the trail from Seattle will be a little more tricky. This trip is 173 miles (278 km) and includes two ferry rides. First, you take the ferry from Seattle to Bainbridge Island. Then, take the Port Angeles to Victoria ferry. Remember that this ferry does cross the border so you will need your passport ready. Once you have landed on the Island, drive along Highway 1A west for 24 km (15 miles) until you see the Juan De Fuca Highway BC 14 W. You'll stay on this for 71 km (44 miles).
The other option is to take the West Coast Trail Express shuttle. This serves both trailheads from Victoria and Nanaimo. The service also runs between the two trailheads, so you can use it to get back to your car.
Map of Recommended Route
The following map outlines our recommended route. Click the "Load Interactive Map" button to load the correct map. Once loaded, you can navigate along the route and view recommended campsites.
For even more detailed mapping, including being able to print a copy for yourself, click the "Open in CalTopo" button at the top of the map once it's loaded into view.
You will also receive an excellent map of the trail with your permit. This includes campsites, places of interest, and distances.
The following are our recommended campsites:
- Day 1 – Gordon River Trailhead to Thrasher Cove (6 km)
- Day 2 – Thrasher Cove to Camper Bay (14 km)
- Day 3 – Camper Bay to Walbran Creek (23 km)
- Day 4 – Walbran Creek to Cribs Creek (34 km)
- Day 5 – Cribs Creek to Tsusiat Falls (51 km)
- Day 6 – Tsusiat Falls to Michigan Creek (64 km)
- Day 7 - Michigan Creek to Pachena Bay (13km)
Trail Description
You can, of course, start at either end. We recommend hiking from south to north, beginning at Gordon River and ending at Pachena Bay. It's important to note that the southern Gordon River entrance requires a ferry ride. This will dictate your starting time on the first day. However, these ferries run regularly.
Day 1 - Gordon River Trailhead to Thrasher Cove
Before you're allowed to start, you'll have to do orientation at the West Coast Trail Information Center. After that, you'll need to catch one of the ferries to the Gordon River Trailhead.
Start with a ladder into the forest. Don't expect any ocean views until you get to camp. The terrain isn't too difficult except for the steep descent to camp. If you're early, take some time to explore the area. Check out the sea caves at Owen Point if the tide allows.
Day 2 - Thrasher Cove to Camper Bay
You have two options today. You can continue in the forest, passing Owen Point. Or, you can stay along the coast and hit up Owen Point. Part of your choice will depend on the tides.
It's slippery getting to Owen Point. Lots of obstacles like seaweed, boulders, and logs await. But, it's well worth seeing the caves. You might get lucky and see some orcas too.
The route through the forest isn't any easier. Many hikers have claimed it to be one of the hardest parts of the trail. There are more downed trees to climb over, mud, roots, and overall wet conditions. These make the going tough. You'll likely be glad you chose to stop at Camper Bay for the night instead of continuing!
Day 3 - Camper Bay to Walbran Creek
More muddiness and ladders await. You might need to use your first cable car. If the water is low, you might feel spunky enough to rock-hop. The next section has the most ladders out of the entire trail. After that, you'll have lots of muddy areas to tackle. There is a large suspension bridge over Logan Creek. After that, you'll have more roots, logs, and ladders to battle.
Day 4 - Walbran Creek to Cribs Creek
The tide will affect which route you take to cross Walbran Creek. If it's high, take the cable car. If it's low, you can cross near the mouth. This day will be tiring. The walk in the wet, deep sand will give you a workout! Enjoy a break near the falls at Bonilla Point.
You'll find another cable car crossing at Carmanha Creek. Another set of ladders and a short forest walk bring you to the Carmanha Lighthouse. Depending on the tides again, you can continue through the forest or along the shore to Cribs Creek.
Day 5 - Cribs Creek to Tsusiat Falls
The next day starts with a significant beach hike. Luckily, the sand is firmer here. There is a short section in the forest. Be ready to scramble across more boulders. Next, come across a suspension bridge over Cheewhat River. Past here are a lot of boardwalks leading to Nitnaht Narrows.
If it's open, try the Crab Shack. Past there is another ferry crossing. A few more miles along the beach brings you to Tsusiat Falls. Take a brisk swim here after setting up camp, if you like!
Day 6 - Tsusiat Falls to Michigan Creek
Cross a bridge, head down some ladders, and cross the Klanawa River with another cable car. You will need to wait for low tide past here. After a bit, you'll head into the forest again. You'll find some good views, though, especially at Valencia Bluff. Pass through Tscowis Creek before reaching the Darling River. Luckily, it's shallow. There's no bridge here. A short distance away is Michigan Creek campground.
Day 7 - Michigan Creek to Pachena Bay
Most hikers find today to be one of the easier days. This is both because of the terrain and the shorter distance. Not far from your campsite is the Pachena Lighthouse. Today is another great day for spotting wildlife, such as sea lions, otters, and whales. A large portion of the rest of the trail is in the forest. There aren't too many obstacles, though. Not long past Clonard Creek, you'll be at the ranger station at Pachena Bay.
What Will I Need?
Before your trip, ensure you have a thorough understanding of the trail map, your exit points, and a tide table. Pack for the chance of heavy rain, including a lightweight tarp and pack cover or dry bags. Also, be sure you can make a fire in wet, rainy conditions. The chances of it raining for part, or all, of your trip are high. Don’t go expecting dry wood. Oh, and don't forget your camera for those amazing sights and ocean sunsets!
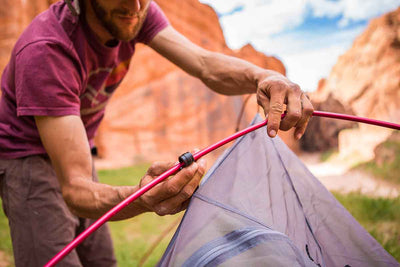
This trail has steep and uneven terrain throughout. Trekking poles are highly recommended. Proper hiking boots will also help to navigate steep slopes. The odds of encountering lots of mud are also high. Gaiters are strongly suggested. There is never a dull moment on this hike with rivers to cross, ladders to climb, and cable cars to soar across!
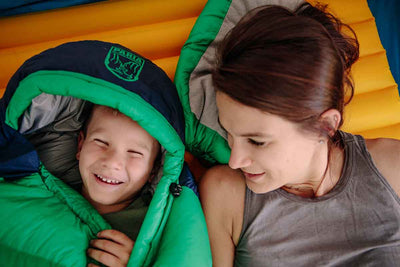
The average highs fall between 51 and 60°F for May through September. The average lows range from 47 to 56°F. Since this hike is so strenuous, you'll want a lightweight backpacking tent. A down sleeping bag or quilt will keep you warm at night. Of course, a good sleeping pad makes a huge difference in your comfort too!

A backpacking quilt is extremely versatile! It can go from an open blanket to a closed-up, mummy-style sleeping bag. This makes them a great option for temperate climates like that of the West Coast Trail.
Make sure you have a portable backpacking stove. It's more reliable than cooking over a fire. Again, it's very rainy here. Be sure you have your cooking pot to heat meals and water with. And, you'll need some silverware of some sort. Like almost any trail, don't forget a reliable water filter too.
If there's anything else you need to complete your pack, visit our full line of high-quality, affordable backpacking gear.
Shop Backpacking Tents
Shop Ultralight Tarps
Shop Backpacking Quilts
Shop Down Sleeping Bags
Shop Insulated Sleeping Pads
Shop Backpacking Pillow
Shop Folding Trekking Poles
Shop Titanium Cookware
Shop Tent and Tarp Accessories
Finally, to make sure you don't forget something at home, use our Ultimate Backpacker's Packing List. It even includes a convenient printable checklist!
Do I Need a Permit?
Whether you're day hiking or overnighting, you'll need a park permit. It's best to get one ASAP. This is especially true if you're going in July or August (peak season). There is limited access between June 15th and September 15th. Only 75 hikers can start the WCT at the Gordon River and Pacheena Bay entries. Additionally, eight hikers are able to start at the Nitinat Narrows mid-way point.
Reservations are non-refundable and cost $25.75 CAD per person. You can pre-book your permit beginning April 1st by phoning HelloBC at 1-800-495-5688 (Canada and USA). Or, call 250-387-1642 (outside of North America). Alternatively, you can visit the Pacific Rim National Park Reserve reservation website.
There is a mandatory and non-refundable permit fee of $166.75 CAD per person. This covers trail maintenance, repair, information, and facilities. There is also a ferry fee of $28 CAD for hikers traveling between the Gordon River Trailhead and across the Nitinat Narrows.
If you're feeling lucky, you can try to get your permit in person. (This is more for day hikes.) These are first-come-first-serve. You can purchase these at any of the three WCT registration offices in Pacific Rim National Park. Again, keep in mind that you are taking your chances and not guaranteed a spot.
Finally, it is important that all hikers register-off this hike. You can do this by returning one copy of your trail use permit to the WCT registration offices. Or, you can drop it into one of the drop boxes.
Resources
Tidal Map
Parks Canada Permit Info
West Coast Trail Express
WCT Official Guidebook at Amazon
Conclusion
Have you done the West Coast Trail or other coastal hikes? Do you have other outstanding hikes that you'd like us to write about? Let us know about them in the comments!
Read Next
If you're looking for more hike ideas, read our “The Best Hikes in the Canadian Rockies” round-up post. Also, the following Hike of the Week articles cover other great trails in the region.
Hike of the Week: Juan de Fuca Trail
Hike of the Week: Della Falls Trail
Hike of the Week: Nootka Trail
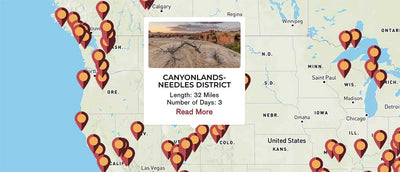
For even more amazing backpacking trips, visit The Trailhead, our interactive hike map. It contains a curated list of dozens of hikes, each with a detailed write-up like this one.

Finally, check out our comprehensive list of backpacking articles that cover just about everything there is to know about backpacking. If you're just starting out, our Backpacking 101 section covers all the basics. If you already have a few trips under your belt, you can find more advanced topics covered in our Expert Articles.


There are no grizzly bears on the Island …plenty of black bear and cougar and the elusive sea wolf
Leave a comment